All wires can be tapped. Luckily Ethernet wires are no exception. This How-to will cover the fastest way to get everything you need for eavesdropping on your network neighbors: setting up 2 bridged Ethernet adapters and configuring them for an uninterrupted network flow, which then can be monitored or shaped.
The most reliable way to achieve full transparency and control over a specific network segment is to have a full featured operating system on a network bridge (a HUB or a Switch) – Having network tools running locally on a relay point is hard to beat. There are lots of commercial grade relay points you can purchase, but any Cisco router which will give you network management tools is likely to still be lacking, and expensive. In other words – good-luck running graphical or 3rd party propriety applications on your 300$ switch.
This How-to will leave you with a box which will always come up with 2 bridged adapters. There will be uninterrupted network flow between the box and the network segment it fragments. There will be remote access and tools to play with. It shall be a real privacy violator. Let’s get to it!
You will need:
- 1 Desktop/Workstation/Server
- 2 Ethernet cards
- Linux distribution (we like Slackware Linux) with this software installed:
- net-tools
- bridge-utils
- iptables
- X11 (recommended for VNC)
- xfs (recommended for VNC)
1. Prepare Ethernet adapters for bridging:
The about to be bridged adapters should have no assigned IPs and placed in promiscuous mode:
# ifconfig eth0 0.0.0.0 promisc up
# ifconfig eth1 0.0.0.0 promisc up
2. Bridge the Ethernet adapters using bridge-utils:
# brctl addbr br0
# brctl addif br0 eth0
# brctl addif br0 eth1
3. Configure and initialize the new network bridge:
# ifconfig br0 192.168.0.233 netmask 255.255.255.0 broadcast 192.168.0.255 up
4. Ensure uninterrupted flow between adapters and bridge:
# iptables -A INPUT -i eth0 -j ACCEPT
# iptables -A INPUT -i eth1 -j ACCEPT
# iptables -A INPUT -i br0 -j ACCEPT
5. Setup networking for the eavesdropping machine itself:
# route add default gateway 192.168.0.1 br0
# echo "nameserver 204.11.104.3" > /etc/resolv.conf
6. Install a TightVNC server for remote access:
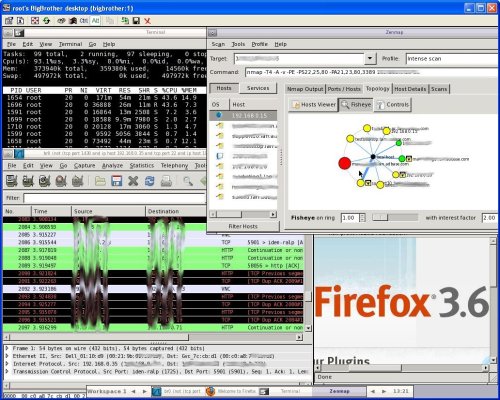
Having access to the graphic environment on the eavesdropping machine is very handy, when you consider the awsome GUI of Wireshark and Zenmap (or the lame fact Wireshark MUST have a GUI to run). TightVNC is the best VNC server out there, and it happens to be free! Get the source, compile and install, then start the X Font Server and TightVNC:
# xfs -daemon
# vncserver :1
7. Install Wireshark (and other tools)
This is where it all comes together – the power of having color-coded packet entries fly by your eyes at the speed of lite, or, well, electricity, is hard to beat. Wireshark is the best network packet analyzer out there. Luckily, it’s also the easiest to run. Get the source, compile and install. ZenMap also goes a long way on such a setup, but as it ships with Slackware, we’ll leave those steps out.
8. Script the whole thing:
This bit is here only to ensure you’ll keep eavesdropping after a reboot 😉 The easiest way to achieve this is to dump all the above commands into a file, make it executable, and place an entry for it in /etc/rc.local.
You can use this tested rc.bigbrother script if you are feeling lazy. It will do all of the above and more. Just place it anywhere and add to /etc/rc.local.
Screen-shot:

